overview
How to Create Gate.io API Keys & Connect to Dash 2 Trade
In this guide, we’ll explain how to safely and securely generate Gate.io API keys and configure API permissions. You will also learn how to connect your Dash 2 Trade account to your Gate.io account and start trading with our crypto bots.
The whole process takes about 5 minutes.
Important: Before you start you will need to create a Fund Password. This is a separate, second password on Gate.io used for things like withdrawals. Follow the instructions in this guide on setting up your Gate.io Fund Password.
Once you’ve set that up, continue with this guide. Here we go!
Step 1: Open “Trading Bots” on the Dash 2 Trade app and select “Add Connection”


Step 2: From the list of exchanges, find Gate.io and click “+ Add keys”

Step 3: Copy Dash 2 Trade IP addresses to the clipboard

Step 4: Open Gate.io and click on the “Profile” icon

Step 5: Click the “Sub-accounts & APIs” dropdown in the navbar on the left

Step 6: Select “API Management”

Step 7: Click “Create API key”

Step 8: Give the API a name, paste in IPs, and configure permissions

The first field is called an “API Key Remark”. This is simply a name and it can be whatever you like. Try using “Dash 2 Trade” like we did!
The second field is where you have to paste the Dash 2 Trade API keys you copied earlier. Make sure to select “Bind IP” if it’s not selected by default. This will make sure only Dash 2 Trade IP addresses can access your Gate.io API.
For permissions you need to select “Spot Trade”, “Wallet”, and “Commission Details”. These configurations are necessary for Dash 2 Trade bots to trade without issue. Enable “Read And Write” on all three.
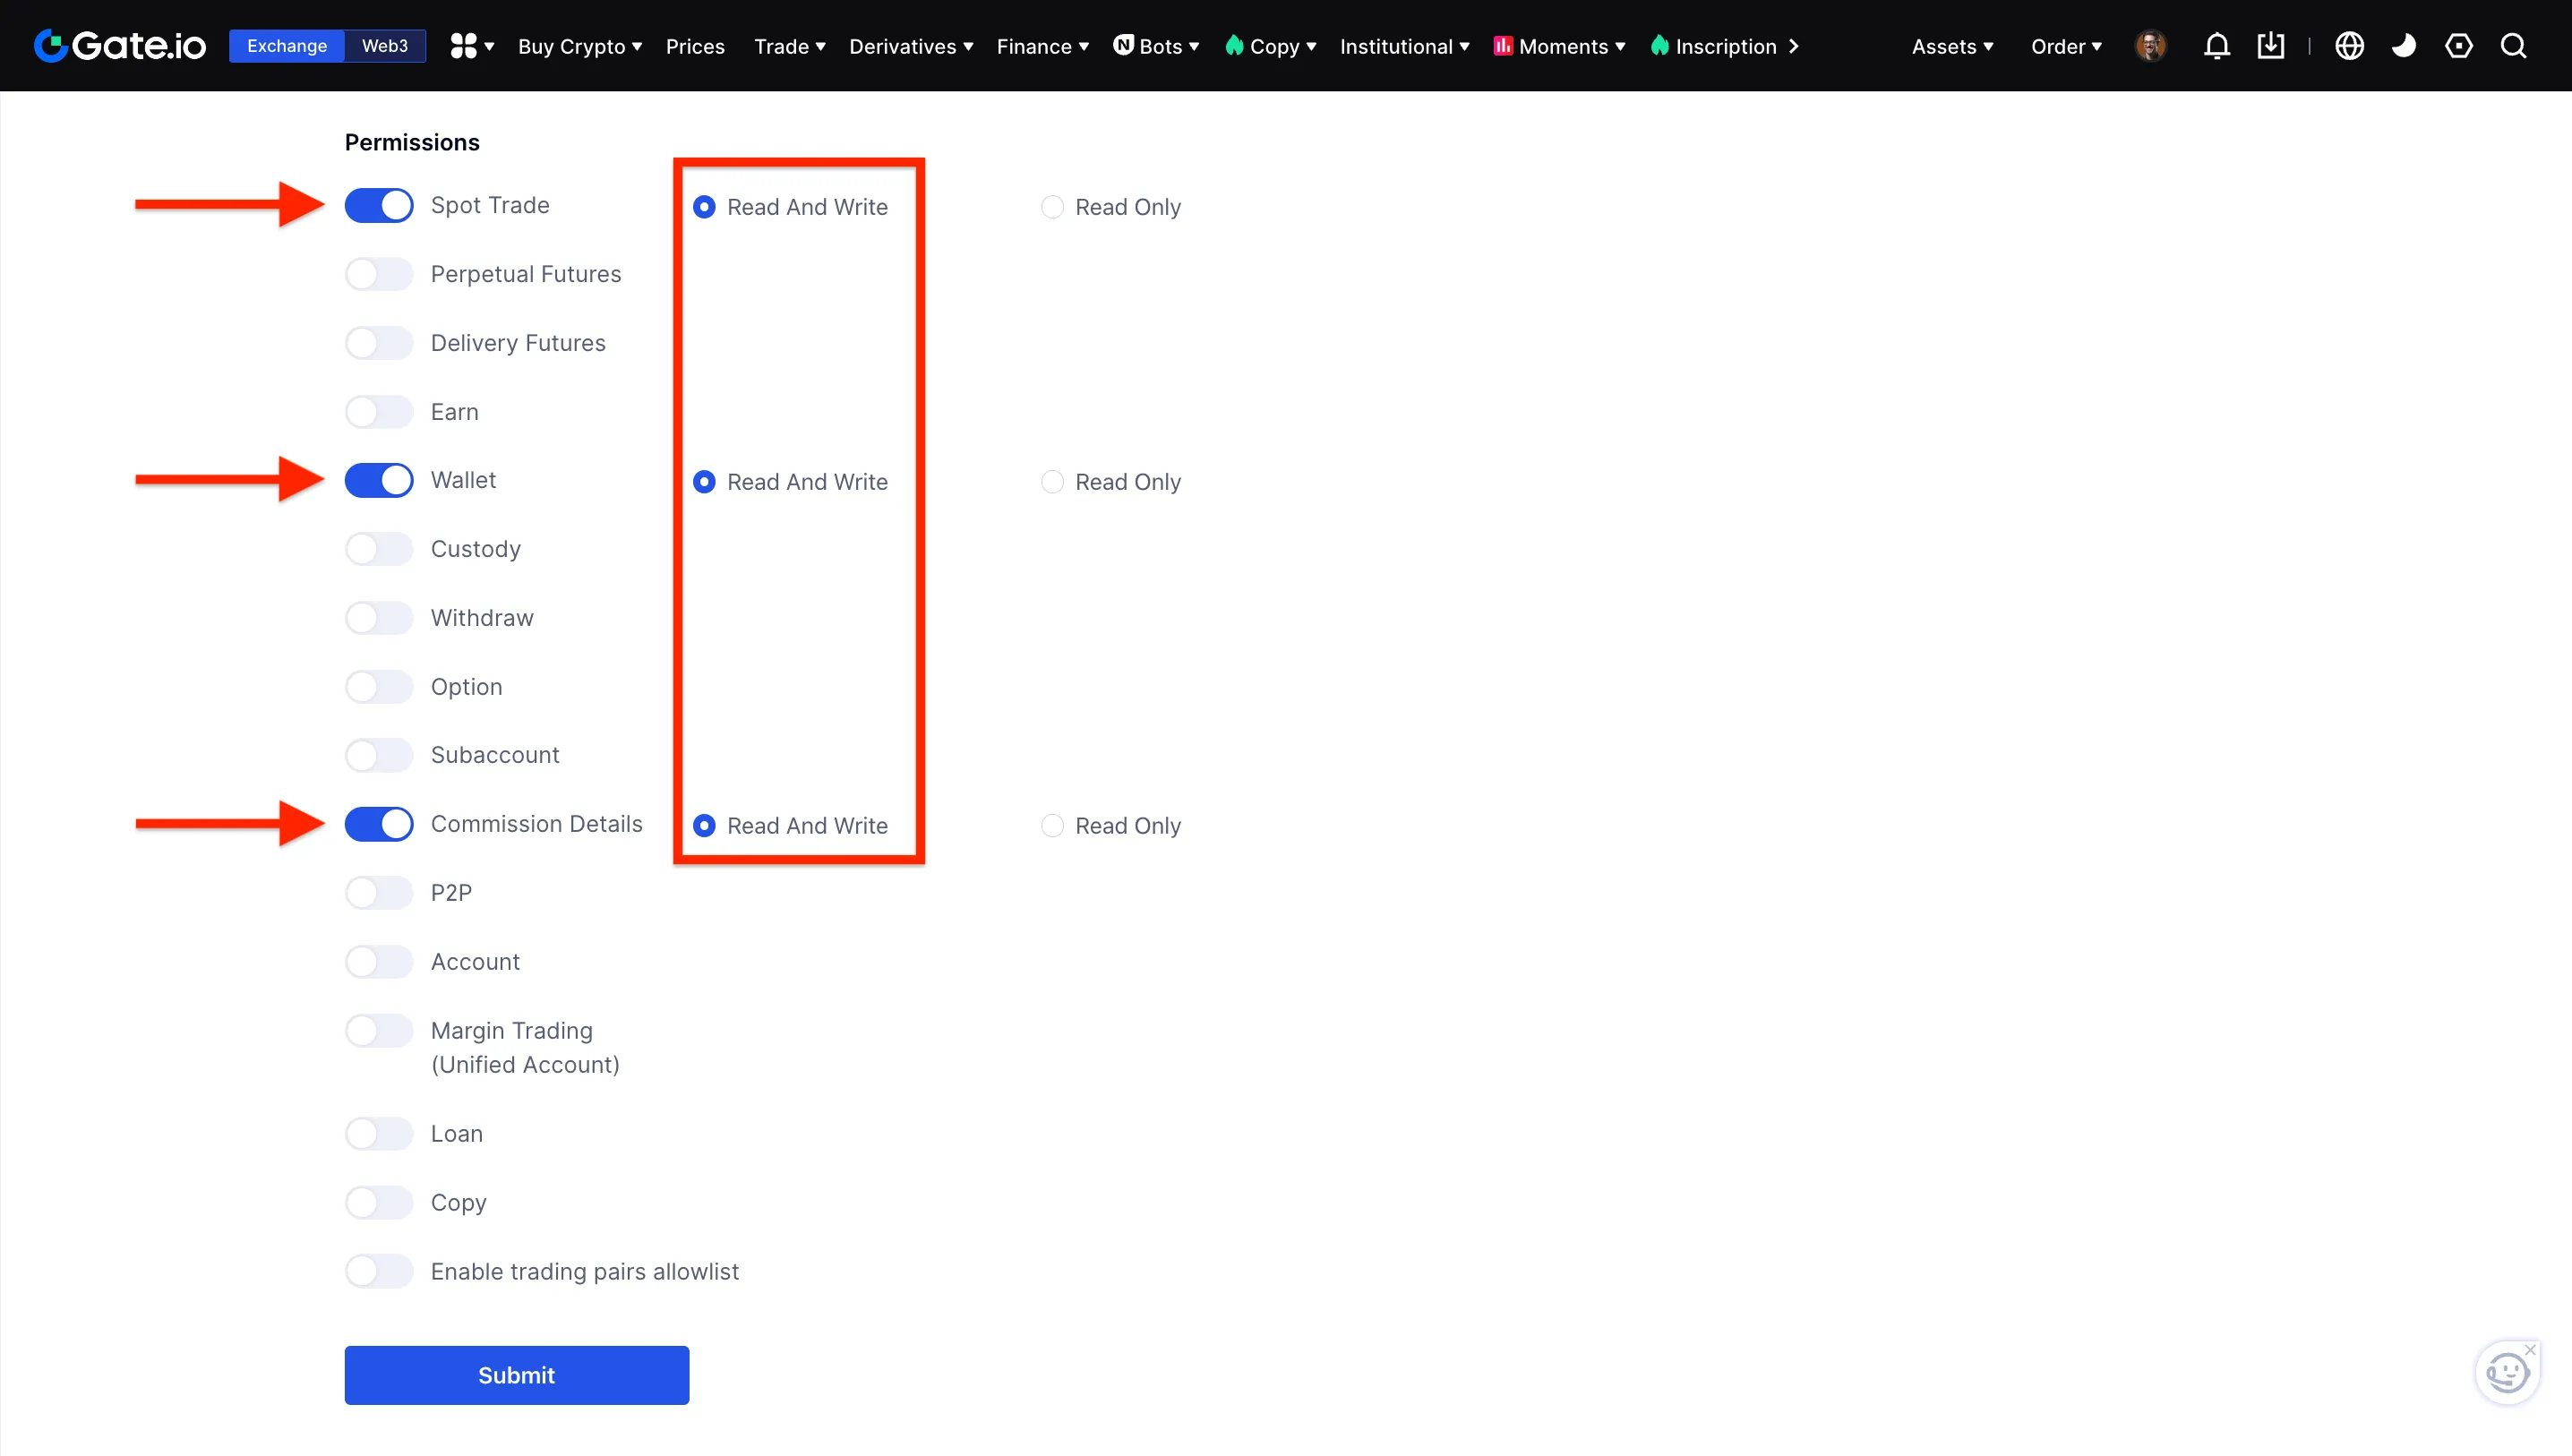
Important: Do not enable any other permissions. We don’t need them and they may pose a security risk in the unlikely event that your keys are compromised.
When you’re done click “Submit” to generate your keys. You may be prompted to complete verification and this is where you will have to use your Fund Password.
Step 9: Copy your new Gate.io API keys and paste them into Dash 2 Trade
Copy the newly generated Gate.io API keys to your clipboard and then paste them on Dash 2 Trade, one by one.

Important: In addition to copying, write down your keys on paper or store them on a device that’s not connected to the internet. Protect them and use them only for Dash 2 Trade — their intended use — never share them with anyone else.

When you’re done you can click “Save Keys”.
Congratulations!
You’ve successfully generated your Gate.io API keys and connected Dash 2 Trade to your Gate.io account.

Troubleshooting Problems
If you ran into any issues while setting up, here are some helpful resources:
If you’re unable to find what you need, contact a moderator from the Dash 2 Trade community Discord server.
What’s Next?
If you want to learn more about how to use the Dash 2 Trade app and all its features, please visit the Guides page.
If you’d like to learn how to become a better algorithmic crypto bot trader, explore the Dash 2 Trade Crypto Trading Academy.
Happy trading!